Monday, February 24, 2014
Buttery Goodness


Sharing at all my fave party places at the bottom of this page!
plus: betweennapsontheporch.net , my uncommon slice of suburbia, The Dedicated House , new house new home new life, Coastal Charm, The Shabby Creek Cottage, From my front porch to yours,
HERA YEA HERA YA CALLING ALL YARD SALERS yard sale announcement


Sunday, February 23, 2014
The New Shop Pt 2 Moved In
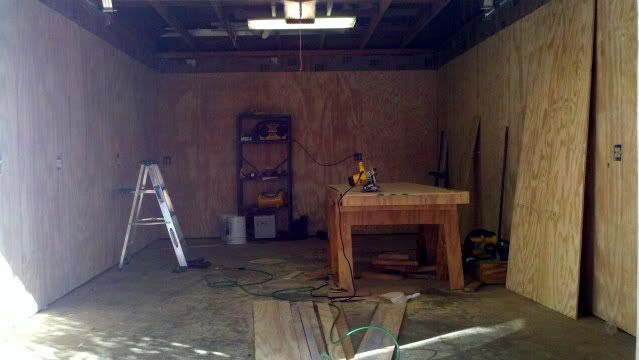
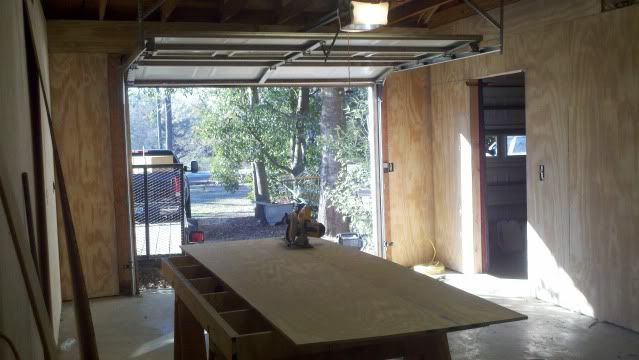
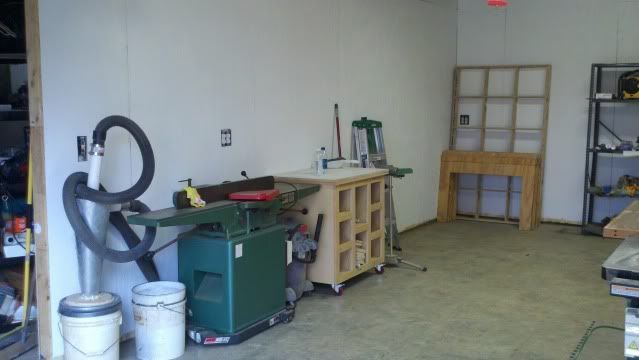
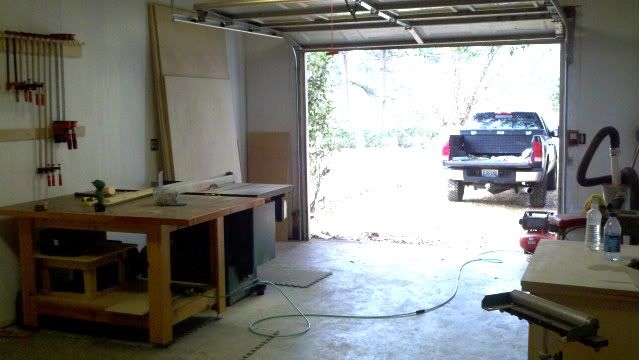
It feels so good to get my tools in there!
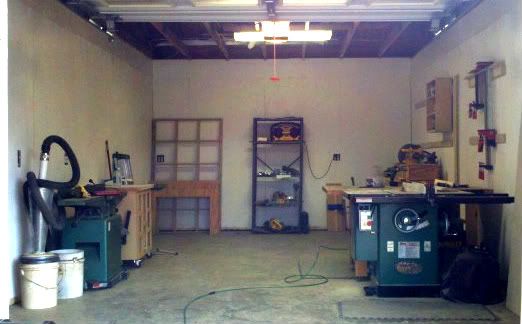
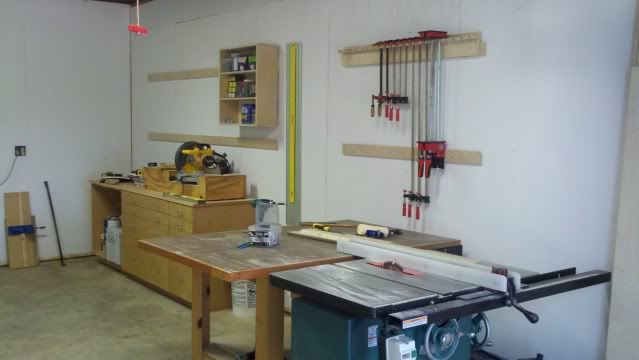
The next few things I am working on are my french cleat system and my lumber rack. I am putting french cleats where ever I can and hanging whatever I can on them. This way everything in my shop can be moved around without much trouble with the only things being permanent on the wall are the lumber rack and the ladder to the attic. You can see where I have already hung a small cabinet and a clamps on my french cleats. The clamps had no where to hang and were taking up valuable space rght off so I made up a quick holder for them. Also, I needed a place to put some fasteners so I made up the small cabinet to hold my hardware.
My lumber rack will be located above the jointer and my unfinished router table. I am making it out of 2x4s and 1/2" plywood, it is pretty simple but should do the job nicely.
Moving into my new shop I will be building lots of new shop furniture and jigs, most of which I will try to make videos on. This afternoon I hope to be able to complete my lumber rack and have a tutorial video made and uploaded by Wednesday. I already have all of the parts cut for the rack I just have to get to videoing!
Saturday, February 22, 2014
Christmas Rescue Mission
For the last several years my dads worked for a chain that likes to decorate the walls of their dinning room in a variety of interesting errata. You have been in them before, they have trombones and old Schwinn bicycles stapled to the walls, along with a hundred other random pieces of wonderful crapola. Much to the dismay of myself and other hand tool woodworkers you can occasionally see a great old wooden plane or a handsaw alongside the flotsam and jetsam. Keep your eyes open, its like a Wheres Waldo puzzle.
Once in a conversation I complained to my father about these potentially great tools being wasted screwed to the walls and I jokingly told him he should let me come in at closing one night and liberate them, freeing them back into the wild where they can make sawdust and be happy. For Christmas this year Dad had a surprise for me. The store is undergoing a remodel, a change in concept, and is losing the junk stapled to the walls. Who knows where the items would end up after they were taken down. Some of them directly into the trash. So my dad took a minute and pulled these two beauties from the trash.
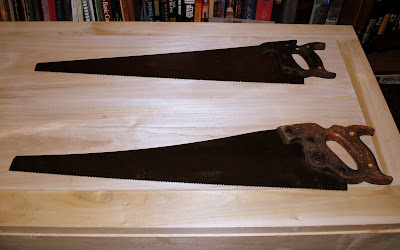
The saw in front is a very standard "Warranted Superior" with a Disston sway back design to the blade

It has a good deal more chip carving in the handle than the other similar saws I own. I think what shocked me a little was that the blades are not brown with rust, theyve been painted that color, There is obviously some rust underneath, but to start restoring these I need to use some paint stripper. What makes me laugh is that they didnt even take care with the paint job. Just sloppily spraying over the saw nuts and medallion.
The steel of both saws is in good shape and both blades are straight.

This is the saw that kind of excites me, (I know, I know, Im a geek), but the handle has one of the most comfortable grips Ive ever wrapped my fingers around. I couldnt begin to guess at the model or make but I know its a little unusual. You dont see many with a steel side plate like this. You can tell its been well used over the years with rivets in the place of lost saw nuts. It is missing a few teeth as well, Im not that worried about it.

All in all it is very nice to have a chance to rescue these beauties from being lost to nick-knack infinity. I hope to have the rehabbed soon and back to happily making sawdust.
Ratione et Passionis
Oldwolf
Friday, February 21, 2014
Quercus Garden Design Three Oaks
Quercus Garden Design - Three Oaks, MI - Home Improvement | Facebook

English Oak - Quercus Robur « Chew Valley Trees
Quercus Robur English Oak

Finally Some Progress
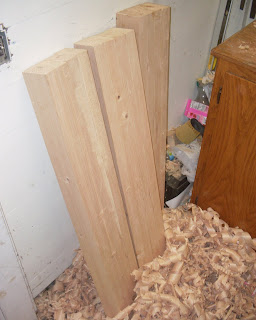
But the cool thing about working my way through is taking tools I have rehabbed and getting them to work again. And getting them to work well is so freaking gratifying, there are almost no words. The first tools I started rehabbing were my saws, and I really got to work with a new skill to start the bench by ripping several 2x8s in half to make the boards to build the laminations for the bench top. That was exhausting work, but the saw I worked so hard to learn to sharpen, joint and set the teeth, it cut wonderful, followed the line and moved the saw dust out. Im sure in hands that would have more stamina those boards would have fallen to the side in short order. For me it took a while, but again, I was the limiting factor.

I had pine boards sandwiched four thick, glue dried and cured. And as you can imagine, with hand ripped boards there are variations in width, Not major but enough. I pulled out the Sargent #5 that I spoke about restoring a while ago (if you want, read about it here) Since I have a good Stanly #5, when I sharpened the blade I lightly cambered the Sargent, so it would work well in thei situation where I need to remove a lot of material. Not as cambered as a true scrub plane, but just enough to work, and it worked well. I worked up a sweat but the boards flattened nicely.

More good time in the shop tomorrow but thats all for tonight.
Cheers!
Oldwolf
Thursday, February 20, 2014
1 Free Woodshop Project Plans Woodworking Plans
Free Woodshop Project Plans
Woodworking Plans
Do-it-Yourself Patterns and Crafts, Woodworking kits, Furniture Plans Plus Much, Much More. Will Show You How to Make 16,000 Different Woodworking Plans. Use The Plans For Fun, Functionality or Profit!
Free Woodshop Project Plans. Wood is a single of the most gorgeous, sturdy and versatile components that you can perform with whilst on a do it yourself project. The beauty of a cabinet door that is completed in wood cannot be matched by any other material no matter if all-natural or man created. As with any project, you would call for a detailed set of plans though you operate with wood and wood based components. This is why it is advised that you use a detailed set of woodworking plans once you program to extensively use wood based materials to comprehensive the project that you have embarked on.
Now let us examine why woodworking plans are essential in any wood based do it your self project. To start with, these plans help you remove waste. If you begin a woodworking project without a firm program, the possibilities are that you would end up utilizing extra wood that you initially intended to. Most of the wood primarily based projects would call for extensive assemblies and sub assemblies.
When you start your project, you would be ideally operating with individual members of wood and finishing them individually just before assembling them. If you do not have the suitable woodwork plans, you could finish up with mismatching wood members at the time of assembly. This could trigger high priced price and time overruns in the project. All these difficulties can be avoided by utilizing a nicely laid out set of wood plans.
The other advantage that you could have if you use woodworking plans are that you would be ready with all the tools and implements that you would require for finishing the wood primarily based project. Frequently we come across that we do not have access to a certain tool in the middle of a woodworking project. This scenario could lead to a loss of time and at times you may perhaps even have to abandon the project in case a certain tool is not offered. All these issues can be avoided if you have a detailed strategy at the onset. Free Woodshop Project Plans

Free Woodshop Project Plans Information
Constant Advertising - The romance of woodworking will have to have to be balanced with the constant promoting and marketing critical to retain the operate coming in. In time, phrase of mouth brings in a lot of operate if you develop a fantastic reputation. Till lastly then, you will will need to get the phrase out routinely. Following the operate arrives in you have to have great manufacturing systems so you can complete the tasks promptly and continue to keep the cash flowing. If jobs take into account also pretty lengthy and the dollars movement stops, it can turn into tricky to shell out the expenditures. Speaking of cash flow, you must construct and adhere to common assortment approaches. This is 1 area where by quite a few woodworkers fail. The payment for the perform will require to be as important as the carry out by itself. If you are lax in accumulating, you will run into prospects who fall short to shell out you and this will cause seriously really serious earnings movement problems.The Small organization - Even even so you like woodworking, you will want to do the dwelling business if you are to make a dwelling at it. Good outcomes generally needs an in-depth data of each woodworking and small business management. If you by no means have each and every, I suggest you hesitate to leap in until you have honed your enterprise capabilities.
Hunting back once more I recognize that my lack of expertise in the course of my startup really a handful of decades back could have been offset with some typical facts and a different person to advise me.Sadly I had to understand most components by trial and error.
Just about just about every and every and just about every week, I take the time to go through the comments that my viewers make about my woodworking website. 1st of all I want to them for taking the time to comment, I undoubtedly worth all of the comments and guidelines. This preceding week there was a comment from a gentleman, who expressed a require to get into woodworking. As a man who is passionate about woodworking, I want to welcome him to the fold. And I want to supply you him all of the ideas and encouragement probable in his endeavors.Free Woodshop Project Plans
Related Free Woodshop Project Plans :
Tag : How Do You Free Woodshop Project Plans, How To Get Rid Off Free Woodshop Project Plans, Best Reviews Of Free Woodshop Project Plans, Where To Buy Free Woodshop Project Plans, Where Can You Buy Free Woodshop Project Plans.
Wednesday, February 19, 2014
DIY Pallet Furniture for Your Beautiful Garden


some claro walnut slab tables
 well, we shipped out a couple more fine slabs of claro walnut from goodhope hardwoods today. ive been buying slabs from them for about 10 years now and ive never been disappointed. these two were no exception ... click the photos to enlarge them ...
 a crotch slab my client found for me in the specials section on their website, a category that comes and goes as needed apparently. this client chose the same simple block base we have used on tables like this before ...
  the table above is part of our shaker series with 1.5" thick solid steel bases. this client wanted to have his base blackened, a patina process we do with a chemical called redi brown from, i think, triple s chemicals ? in LA. ill have to look it up.
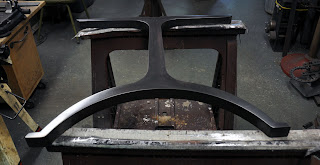 sam did a beautiful job applying the patina and neutralizing it, and we then sprayed on a couple coats of clear satin metal finish.
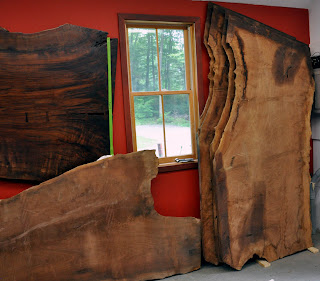 we started with two of these slabs ... the one on the wall we previously made into a coffee table and shipped it to aspen; the horizontal one is now the coffee table above, and the one on top of the stack standing vertically became the dining table.
 here trevors chiseling in the butterfly keys to restrain the natural drying cracks.
 ready to plane flush ...
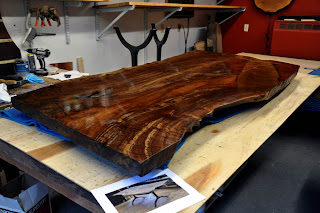 off to the finish room for its first coat of gloss ...
 and today, jim took off in the town and country for north east hampton, long island. i cant feel too sorry for anyone who gets paid to take six ferry rides over two days, even if it is a long drive ... he was ready to go when he left. youve got to be at least a little amazed that we can get two 7 plus tables and 8 chairs in here and still have room for more, even if there will be some assembly required on delivery ... and, its a smooth ride to boot ... almost wish i were going myself ... next time for sure ...
other claro walnut tables
50 x 120 x 3" thick
36 x 120 x 2.25" thick
a 5/4 coffee table
36 x 94 x 1/25"